
If you enjoy incorporating ginger into your diet but find the prep work tedious, you are not alone! There are multiple ways to prep and freeze ginger for cooking that will last for months.

Jump to:
Advantages of Preparing and Freezing Ginger
While unpeeled fresh ginger root can last over a month in the refrigerator, using it each time requires some prep work. If you peel, slice, chop, or mince your ginger before storing it, it will only last for a couple of weeks.
Pureeing ginger and freezing it in small portions will last for months and eliminate the prep work each time you need to use it. There is no need to defrost in advance. Just toss it in the pan when cooking or in the blender when making smoothies. Freezing is also a great way to avoid food waste and retain most of the nutritional value.
Frozen ginger retains a lot more flavor than ginger powder or ground ginger, so it's an excellent way to add warmth and spice to your cooking.
What Are the Health Benefits of Eating Ginger?
Ginger is considered a superfood due to its high anti-oxidant and anti-inflammatory properties. It has medicinal uses tied to ancient traditions and modern practices that are backed by science. Here are some reasons why incorporating ginger into your diet on a daily basis may be beneficial to your health:
- Supports digestion
- Reduces joint pain
- Relieves nausea
- Lowers blood sugar
- Lowers LDL cholesterol
- Supports/improves brain health
Ingredients
Preparing ginger ahead of time for ease of use later only requires one ingredient...ginger! Make sure to choose organic ginger as there are several pesticides used to grow ginger conventionally.
You don't need to add oil or water to turn it into a puree. I recommend finding large pieces of ginger root at the grocery store as they are easier to prepare than a small ginger piece.

Instructions (Multiple Ways, One Favorite!)

There are many tools and techniques for preparing ginger before freezing, so I'll cover a few options that I have found to be the most convenient. Once pureed, there are multiple ways you can freeze the ginger paste based on what type of containers you already have on hand.
How to Peel Ginger

You may need to cut your ginger root in half to make it easier to work with.
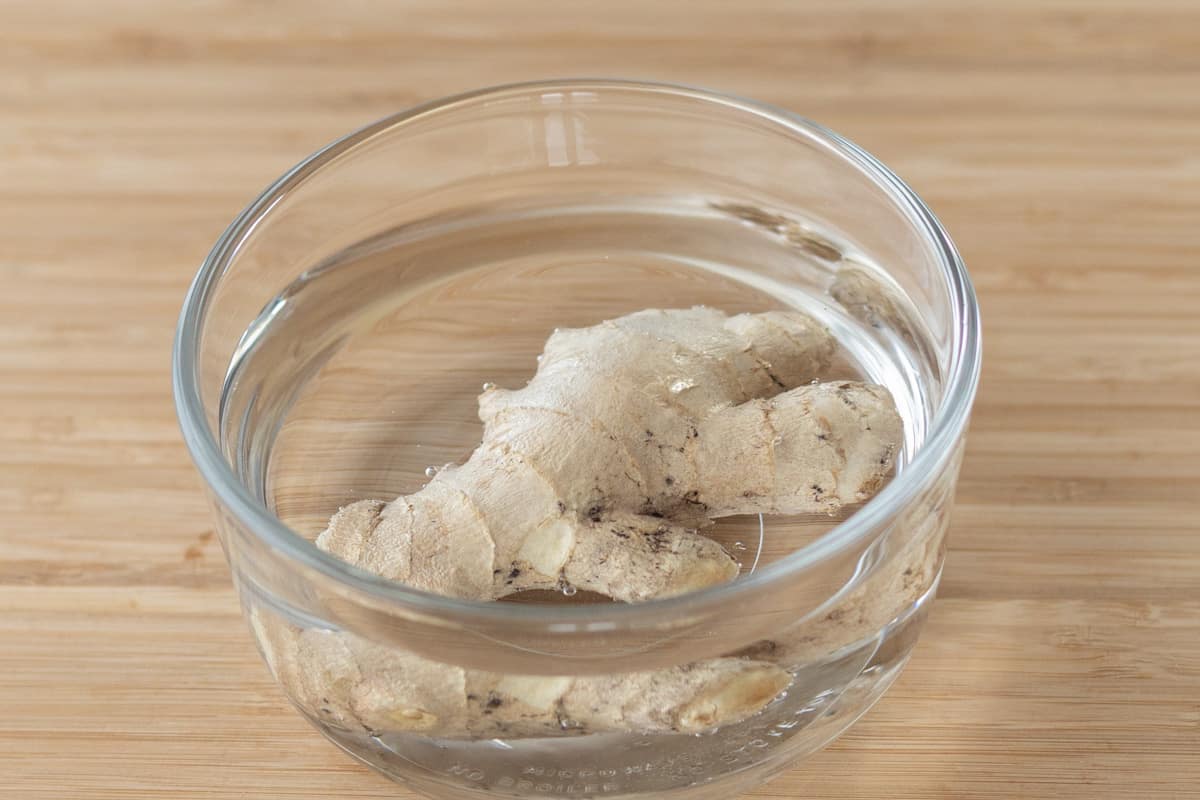
When using a spoon to peel ginger, it's a good idea to first soak the ginger root in water for about ten minutes. This will make the skin easier to remove.
Method 1
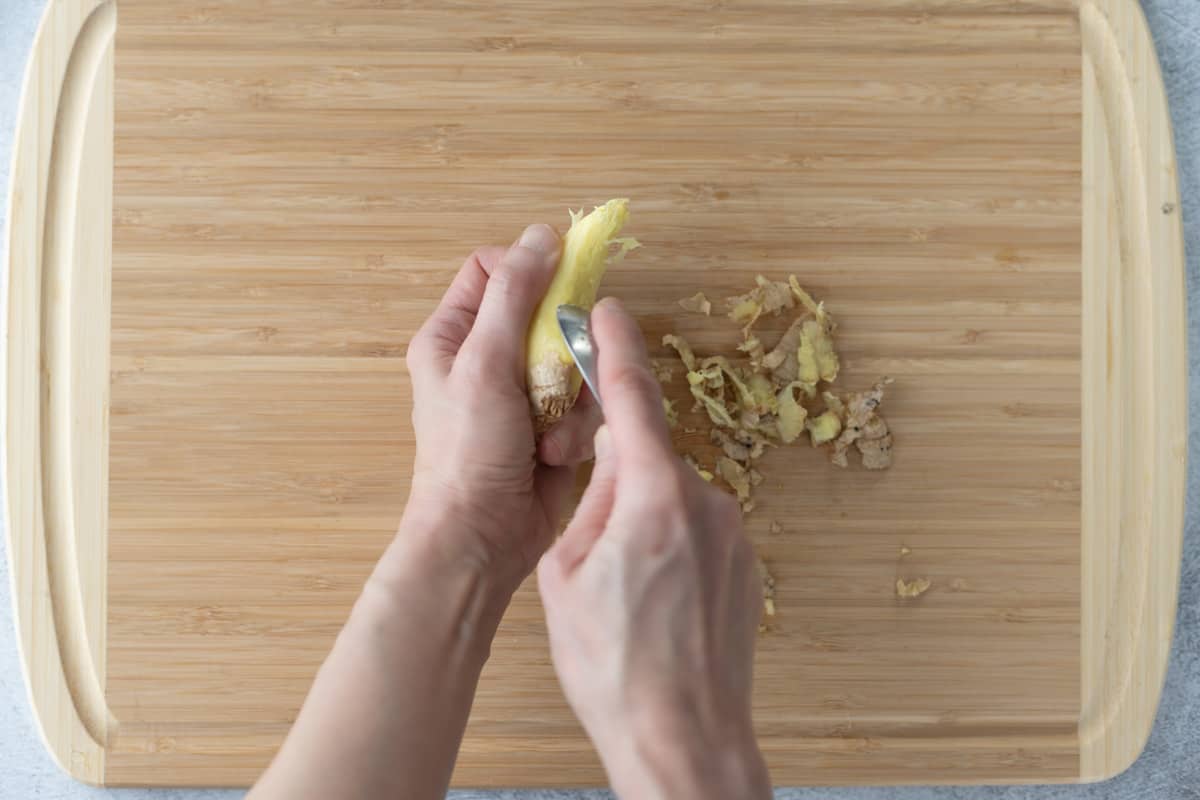
Using a spoon to peel ginger is surprisingly quick and most effective when peeling tricky nooks and angles.

You don't have to do much cutting to peel all sides. I can often peel the whole root without using a knife.
Method 2
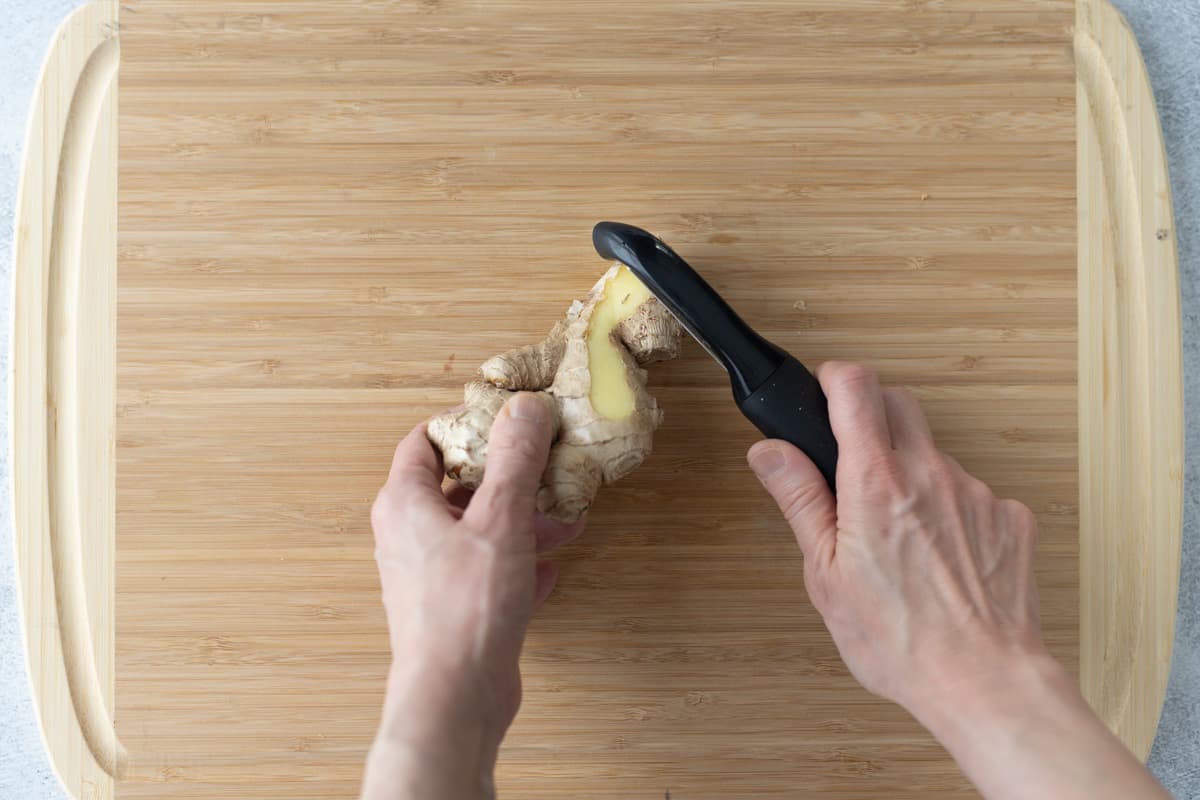
Alternatively, you can use a vegetable peeler to remove most of the skin and leave the rest alone. You can also cut the ginger root apart to peel off everything.

If you are using organic ginger root, removing the ginger skin is optional. Unpeeled ginger root can affect the taste, so it's a personal preference whether and how much skin to remove.
How to Puree Ginger
The best way to puree ginger is to use a food processor. It only takes a minute or two to puree a large batch of ginger and then it is ready to freeze.
Using a blender also works, but you'll likely spend a lot of time scraping down the sides of your blender several times between blending to get all the small pieces incorporated. In addition, getting the ginger puree out of a blender takes more work.
While using a Microplane grater or box grater can work well for a single recipe, I wouldn't recommend taking this approach when preparing a large batch for freezing.
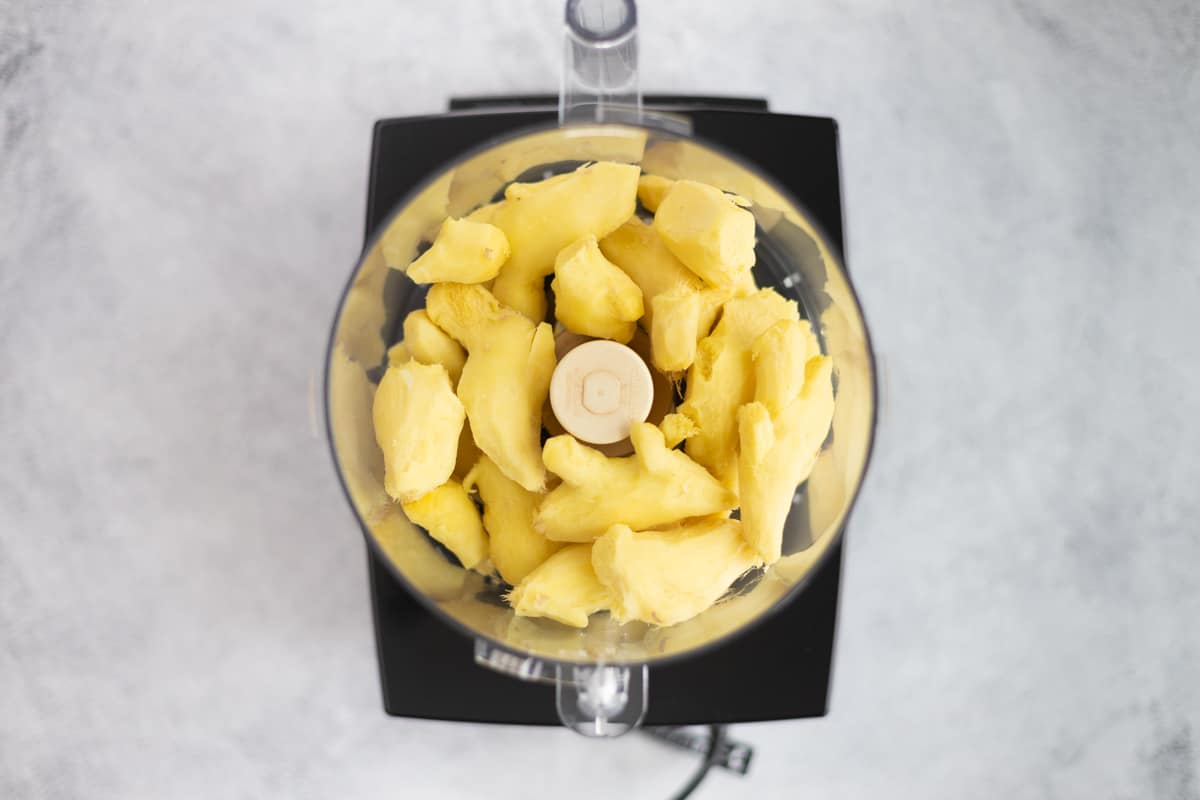
Place the ginger root into a food processor. Depending on your equipment, you may need to blend in batches. I can generally blend one pound of ginger per batch, which results in enough ginger paste for months of usage.
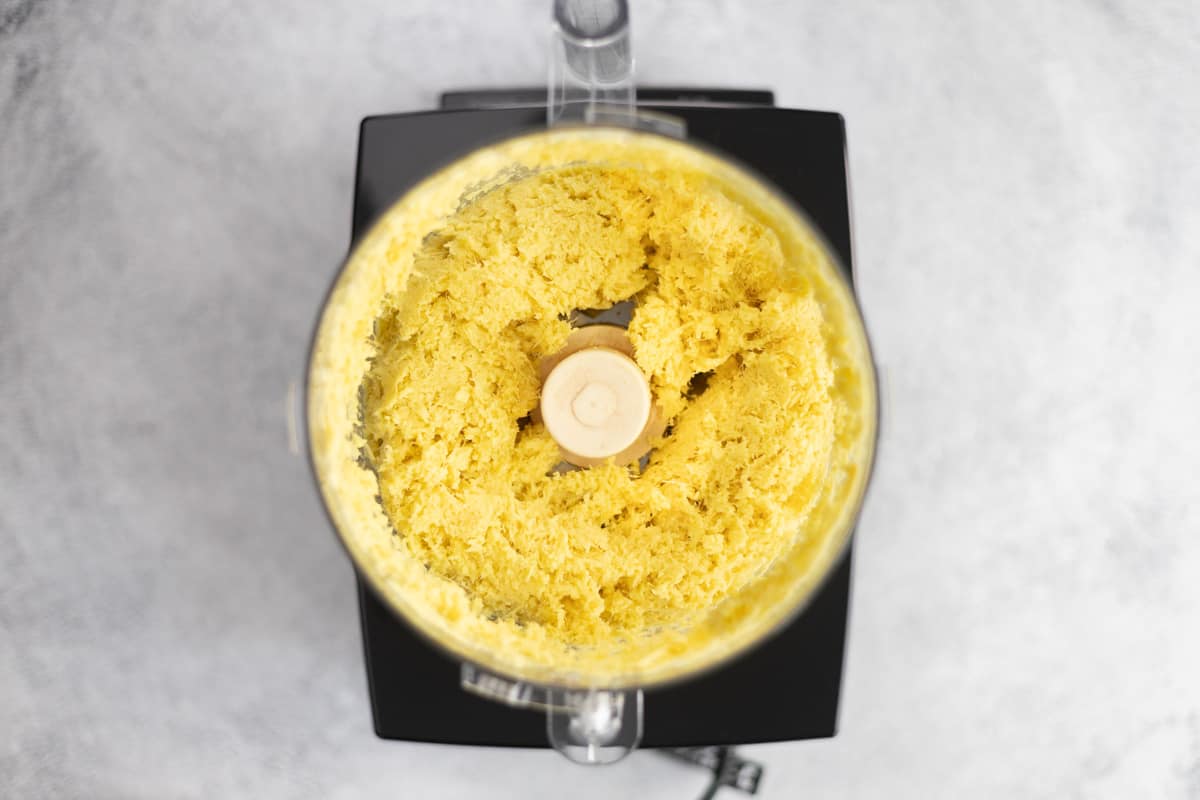
Pulse/blend until the ginger turns into a puree, about 1-2 minutes. Don't forget to remove the blade attachment before proceeding to the next step.
4 Different Methods to Freeze Ginger
Once you've pureed the ginger, you have multiple options for freezing the ginger paste for future use. Spoiler alert - Method 4 is my favorite!
Method 1
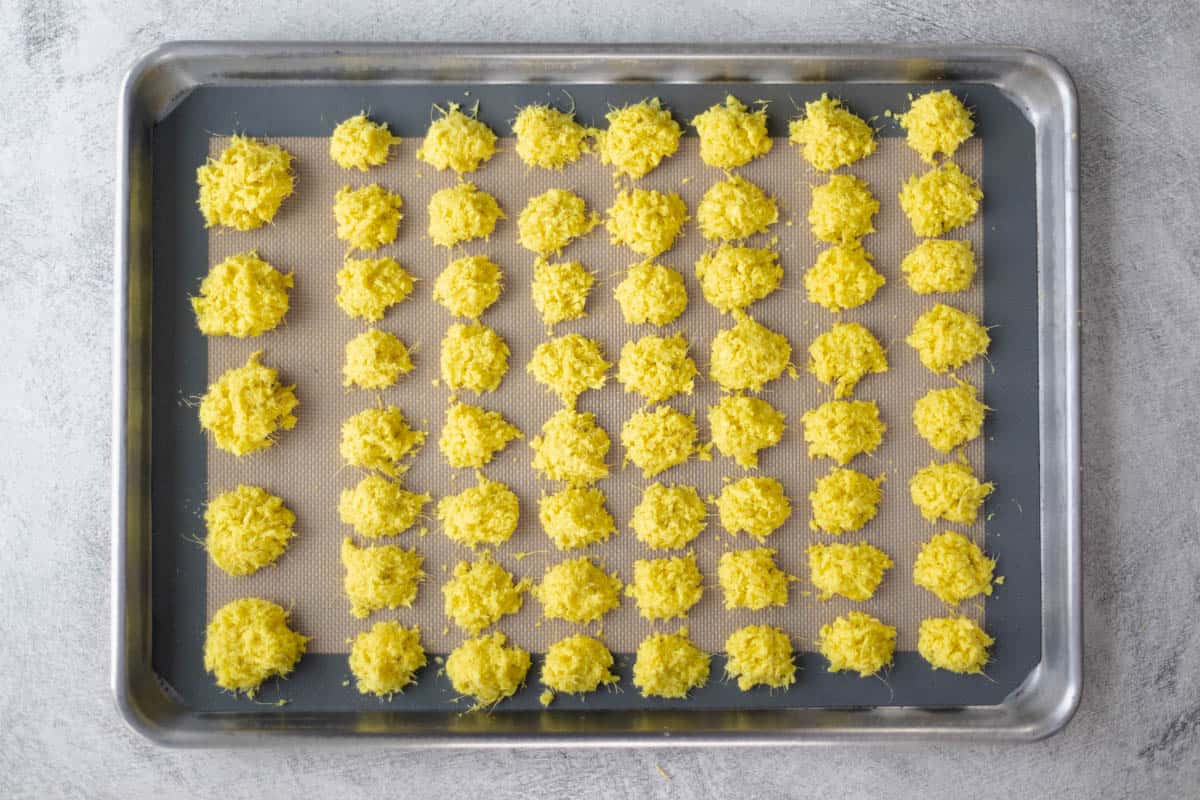
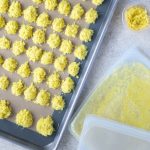
Line a baking sheet or cookie sheet with parchment paper or use a silicone baking mat. Place one tablespoon or one teaspoon portions of ginger in a single layer on the baking sheet and flash freeze them for 2-4 hours.

Once frozen, transfer them to a freezer-safe bag or airtight container. This method allows you to only remove the amount you need each time.
Method 2

Portion the ginger into small freezer-safe containers. I use this method when I'm short on time as it's the fastest way to store pureed ginger.
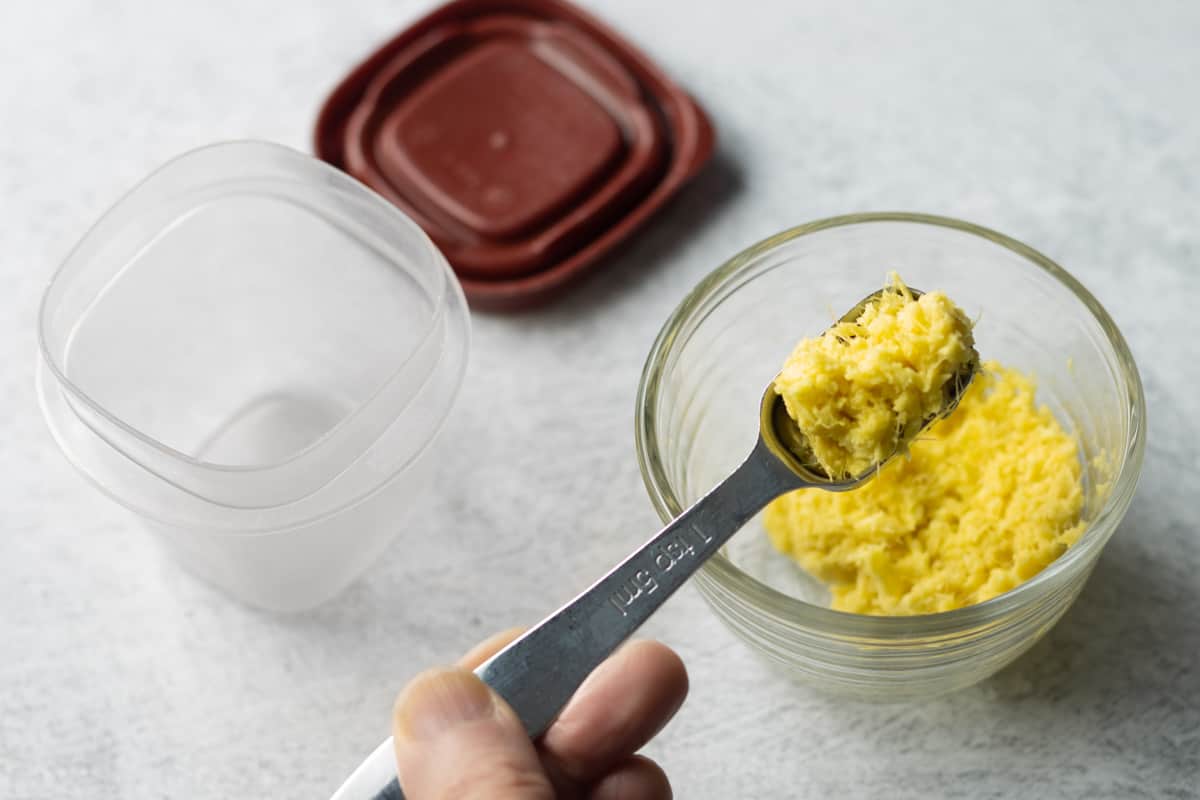
When ready to use, transfer the ginger to a microwave-safe glass container and defrost for 20-30 seconds in the microwave. This will soften the outer layer of the frozen ginger so that you can easily remove up to a tablespoon amount and put the rest back in the freezer.
Method 3

Store the ginger puree in a silicone or Ziploc freezer bag and press it into a thin layer. Before sealing, press out as much air as possible to avoid freezer burn.
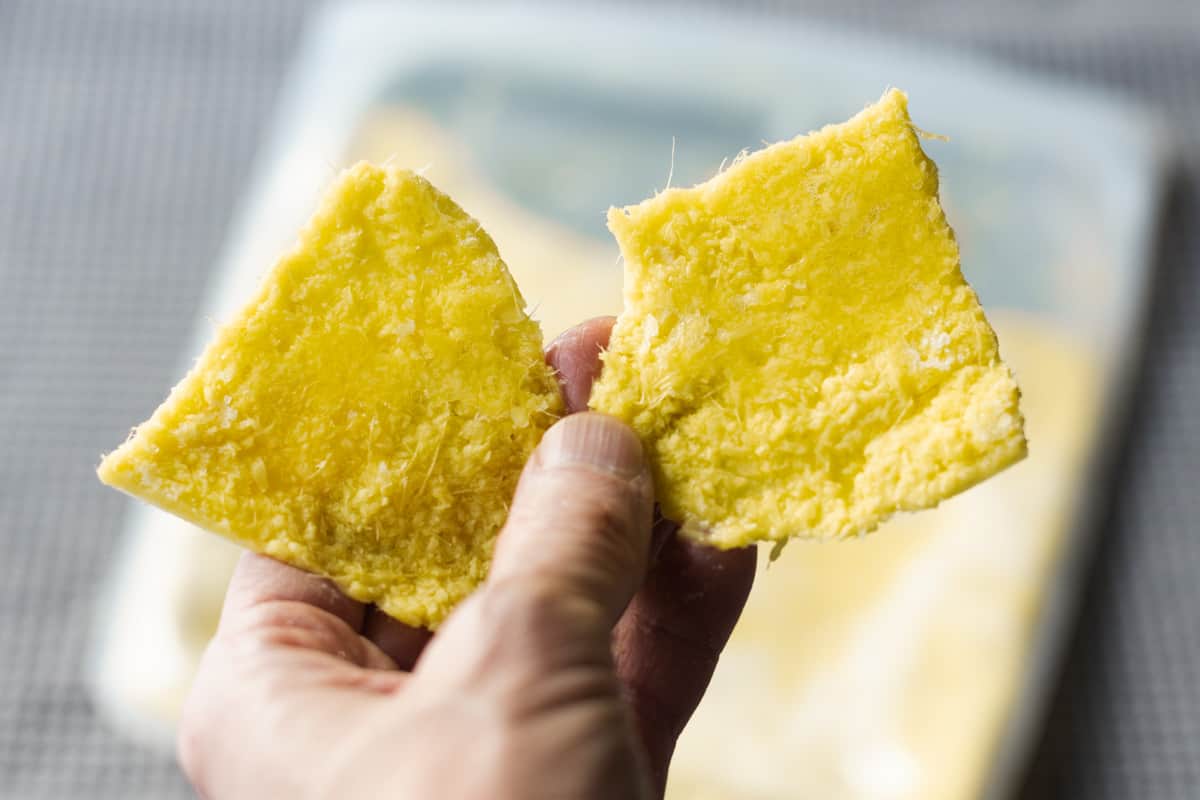
When ready to use, break off the amount you need each time.
Method 4 (my favorite!)
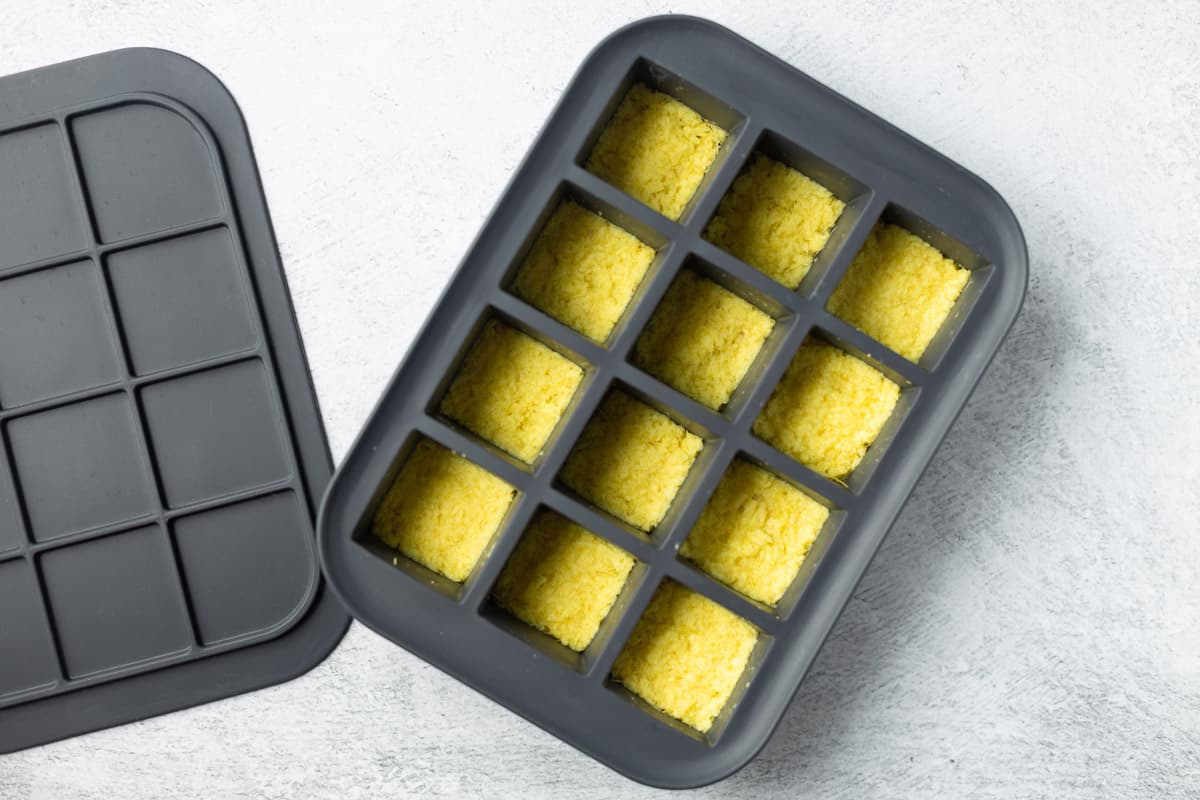
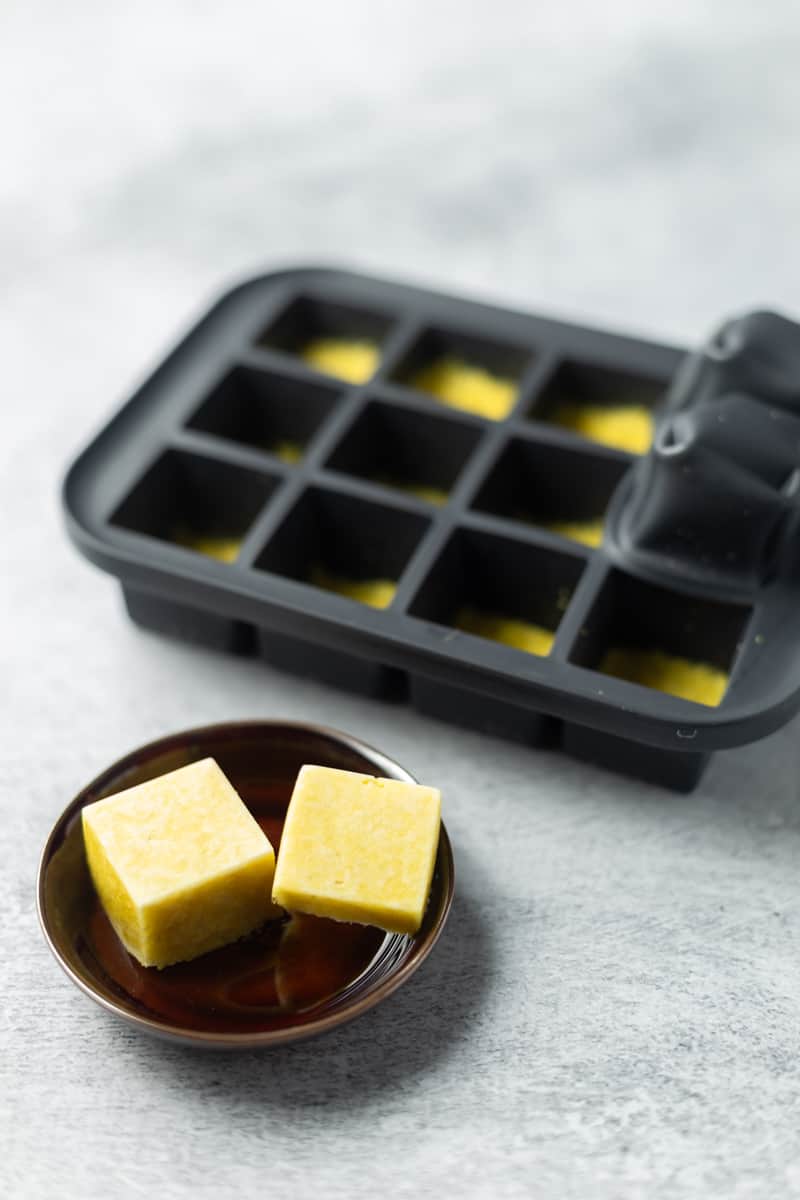
Store the ginger puree in ice-cube trays to make ginger cubes. You can use a teaspoon or tablespoon to add the amount desired to each compartment. Make sure to use an ice cube tray that has a lid or put it in a freezer-safe bag. Squeeze out the air before sealing.
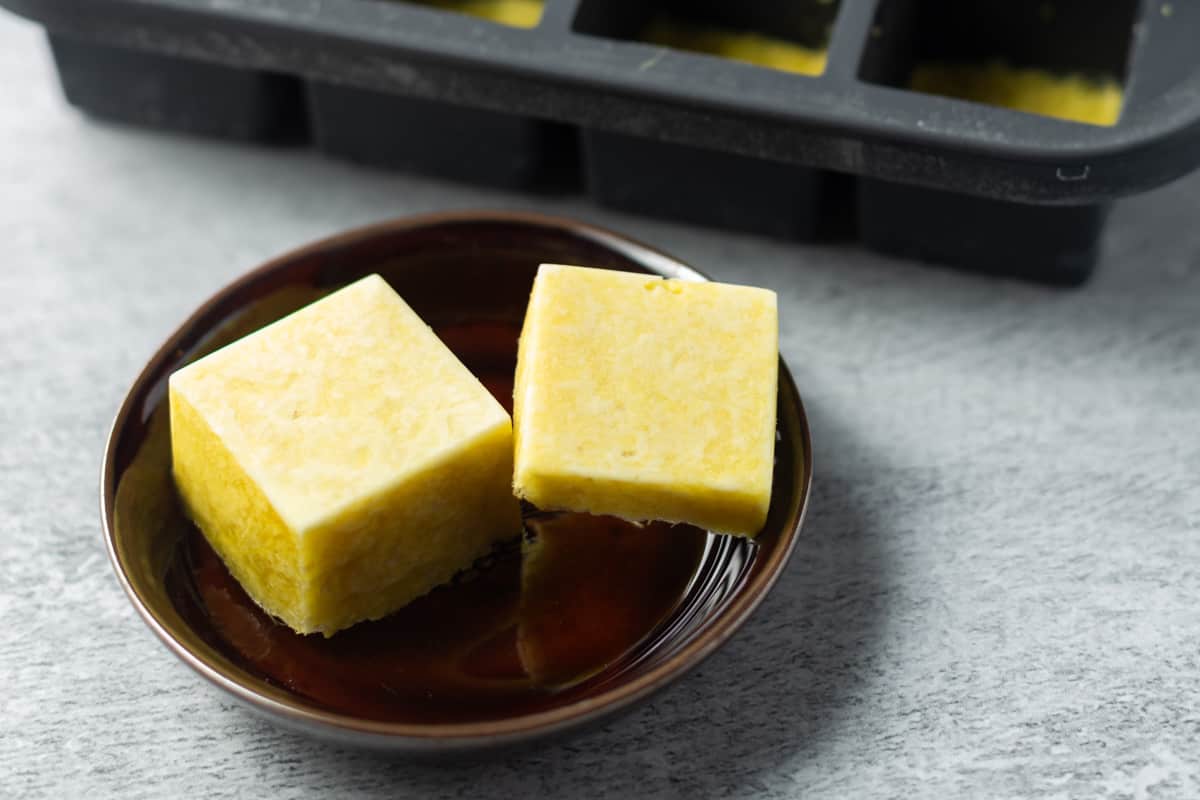
Silicone ice cube trays work well because the cubes push out really easily without having to slightly thaw the entire tray at room temperature. In this photo, I popped out a tablespoon-sized cube and a teaspoon-sized cube.
Here Are the Reasons Why "Method 4" Is My Favorite Way to Freeze Ginger Paste:
- It's the fastest way to freeze specific amounts of ginger for later use.
- You can easily take out the amount you need for cooking without defrosting.
- You can return the unused portion back to the freezer in the least amount of time, causing less freezer burn.
Whichever method you choose to peel, puree, and freeze ginger, you won't regret the up-front effort. Nothing beats having quick-use ingredients on hand to put together a healthy meal. You'll likely incorporate ginger into your diet more often this way.
How to Use Frozen Pureed Ginger When Cooking
Once you have frozen ginger paste on hand, you can use them in all your favorite recipes! Toss them in stir-fries or even use them in smoothies to add a hint of spice and fresh flavor. Ginger is a key ingredient in this tropical island green smoothie recipe!
Variations
If you like making ginger tea, you can reserve some ginger root and cut it into thin slices for freezing. To make the tea, just put a few frozen slices in a cup of very hot water and let it steep for 15 minutes. Sipping ginger tea is so satisfying as it leaves a sweet aftertaste!
Storage
Ginger paste can be stored in the freezer for 3-4 months. If you use a deep-freeze freezer, it will likely last even longer. I've had success for up to 6 months.
Top tip
When using ginger paste, be sure to return the unused portion to the freezer as soon as possible. This will help to avoid freezer burn, which can degrade the taste, quality, and shelf life.
FAQ
Absolutely! Whether you peel ginger before freezing is a matter of personal preference.
Yes, you should wash ginger root before freezing. Make sure that it is completely dry before storing to avoid freezer burn.
You can freeze whole ginger root to prolong shelf-life, but it will be more difficult to cut and a bit cold to handle straight out of the freezer.
Recipe
How to Freeze Ginger for Cooking
INGREDIENTS
- 1 pound organic ginger root
INSTRUCTIONS
- Using a vegetable peeler or spoon, peel each ginger root.
- Rinse the ginger clean and place inside a food processor to make ginger paste.
- Blend for 1-2 minutes to puree to your desired consistency.
How to Freeze Ginger Paste
- Method 1: Using a lined baking sheet, place 1 tablespoon or 1 teaspoon portions in a single layer. Freeze for at least 2 hours before transferring it to an airtight container for storage.When ready to use, take out the amount needed. Return the remaining unused portion back into the freezer.
- Method 2: Store ginger paste in several small freezer safe container. When ready to use, transfer to a glass microwave-safe container and microwave for 30 seconds. The outer layer of ginger should be defrosted, allowing you to remove up to a tablespoon of ginger for use. Return the remaining unused portion back into the freezer.
- Method 3: Transfer the ginger paste to larger freezer-safe bags. Using your hands, press the ginger into a thin layer and remove all of the air before sealing. Place in freezer.When ready to use, remove one of the bags and break off the amount needed and return the remaining unused portion back into the freezer.
- Method 4: Store the ginger puree in ice-cube trays to make ginger cubes. You can use a teaspoon or tablespoon to add the amount desired to each compartment. Make sure to use an ice cube tray that has a lid or put it in a freezer-safe bag. Squeeze out the air before sealing.When ready to use, pop out as many as needed and return the remaining unused portion back into the freezer.
NOTES
- When using a spoon to peel ginger, it's a good idea to first soak the ginger root in water for about ten minutes. This will make the skin easier to remove.
- When using ginger paste, be sure to return the unused portion to the freezer as soon as possible. This will help to avoid freezer burn, which can degrade the taste, quality, and shelf life.

Jannette says
I really enjoyed reading this post and discovered some valuable information. Thanks for sharing your insights with your readers.
Elcy Wang says
Thank you Jannette!